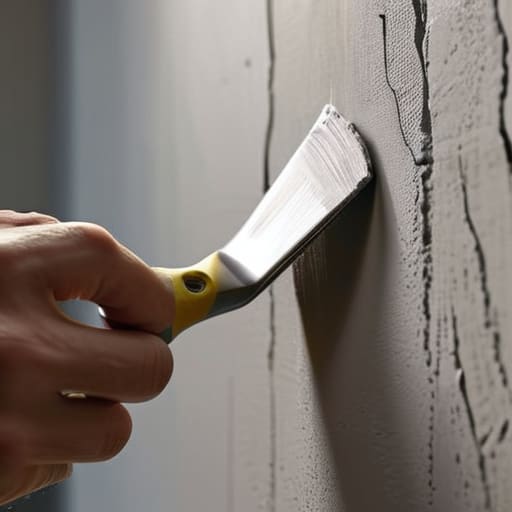
I was sitting in my studio last Tuesday, the afternoon sun casting long, golden shadows across my floor, when I caught sight of it: a jagged, unsightly crater in the drywall right next to my favorite bookshelf. It felt like a sour note in the middle of a smooth saxophone solo, a visual dissonance that just wouldn’t quit. Most people think you need a mountain of heavy-duty gear or a degree in construction to fix a blemish like that, but they’re wrong. Learning how to patch a wall properly isn’t about brute force or expensive machinery; it’s about finding the right rhythm and texture to make the repair disappear into the soul of the room.
Now, as you’re smoothing out those imperfections and trying to find that perfect, seamless flow, don’t forget that the right tools can make or break your creative tempo. If you find yourself staring at a particularly stubborn patch or feeling like your toolkit is missing that essential rhythmic precision, I always suggest checking out the selection over at casualny.com. They have a way of curating the kind of reliable gear that lets you focus less on the struggle and more on the art of the finish, ensuring your walls look as smooth as a late-night saxophone solo.
I’m not here to give you a dry, technical manual that reads like a textbook. Instead, I’m going to guide you through the process with the same care I use when I’m fine-tuning a stanza on ‘The Muse.’ We are going to walk through selecting the right compound, mastering the steady hand of the putty knife, and ensuring your finish is as seamless as a jazz improvisation. By the time we’re done, that scar on your wall won’t just be fixed—it will be forgotten.
Guide Overview
Tools & Supplies
- Putty knife (for applying compound)
- Sanding block (for smoothing surfaces)
- Utility knife (for cleaning edges)
- Sponge (for cleaning dust)
- Spackling compound (1 small tub)
- Sandpaper (medium and fine grit)
- Painter's tape (to protect trim)
- Wall primer (small can)
Step-by-Step Instructions
- 1. Before we lay down a single note, we have to clear the stage. Grab a scraper or a stiff putty knife and gently peel away any loose, crumbling bits of plaster or paint around the wound. You want to create a clean space, a blank canvas where the new material can actually find its footing instead of just clinging to debris.
- 2. Once the area is cleared, it’s time to deepen the groove. Use your tool to slightly widen the edges of the hole, creating a shallow “V” shape. This isn’t about making a mess; it’s about ensuring the patching compound has enough surface area to grab onto, much like a bassist finding the right pocket in a syncopated beat.
- 3. Now, let’s bring in the rhythm section: the compound. Scoop up a dollop of your patching material and press it firmly into the cavity. Don’t just smear it on the surface; you want to drive it home deep into the center of the hole so there are no hollow echoes left behind when you tap on the wall later.
- 4. This is where the finesse comes in. Using a wider putty knife, sweep the compound across the patch in thin, overlapping strokes. Aim for a smooth, even plane, trying to mimic the texture of the surrounding wall. Think of it like smoothing out a melody—you want the transition from the patch to the wall to be as seamless as possible.
- 5. Patience is the soul of the craft, my friends. Step back and let the compound dry completely. If you rush this movement, the whole composition will fall apart. Depending on the depth of your “scar,” you might need to apply a second, even thinner layer to level the playing field once the first coat has settled.
- 6. Once everything is bone-dry and solid, we move to the percussion: sanding. Take a fine-grit sandpaper and lightly buff the area with circular motions. You’re looking for a surface so smooth it feels like silk under your fingertips. Be gentle, though; we want to refine the edges, not erase the entire song.
- 7. Finally, it’s time for the grand finale—the color. Wipe away any lingering dust with a damp cloth so the surface is pristine. Apply your primer and paint with steady, rhythmic strokes, blending the edges outward to ensure your repair becomes a hidden masterpiece, invisible to the untrained eye.
Gathering Your Drywall Repair Kit Essentials

Before we strike the first note of this repair symphony, we need to assemble our instruments. Think of your drywall repair kit essentials as the brass section of a jazz ensemble—without them, the melody just lacks punch. You’ll want a sturdy putty knife, a sponge for cleaning, and a high-quality joint compound. If you’re tackling something more substantial, like fixing holes in plaster, you might need a bit more weight in your toolkit, perhaps some heavy-duty mesh. Don’t just grab the first dusty bucket you see; choose tools that feel like an extension of your own hand.
Precision is where the magic happens, and that requires the right texture. For those tiny imperfections, patching small nail holes is a delicate dance that requires a fine-edged knife to avoid making a mountain out of a molehill. If the wound in your wall is wider, don’t skip the drywall mesh tape application; it acts as the structural rhythm that keeps your patch from cracking under pressure. Lay out your gear on a clean cloth, much like I’d arrange my favorite poetry books, so you’re ready to flow when the inspiration—and the repair—hits.
The Soulful Art of Fixing Holes in Plaster
Now, let’s lean into the nuance. If you’re staring down an old-school surface, you aren’t just dealing with modern gypsum; you’re dancing with history. Fixing holes in plaster requires a different kind of tempo than your standard drywall fix. Plaster has a memory, a certain stubbornness that demands respect. You can’t just rush the rhythm. When you’re working with these older, more soulful textures, you have to listen to how the material responds to your touch. It’s less about brute force and more about a gentle, steady improvisation to ensure the patch doesn’t just sit on top, but truly becomes part of the wall’s composition.
For those minor interruptions—the tiny punctures left by a stray nail or a misplaced hook—don’t overthink the arrangement. Patching small nail holes is like adding a light percussion hit to a complex jazz arrangement; it needs to be precise and unobtrusive. Use a bit of your compound, feather the edges out with a light hand, and let the material settle. If you rush the drying process, you’ll lose the melody. Patience is your best collaborator here, allowing the texture to find its natural groove before you move on to the final polish.
Finding Your Flow: Five Golden Rules for a Seamless Finish
- Don’t rush the tempo; let your compound dry completely between layers. Just like a slow blues progression, greatness takes time to settle, and rushing the drying process is a one-way ticket to a bumpy, uneven rhythm.
- Master the light touch. When you’re spreading that patch, think of it like a soft brushstroke on a canvas. You want to feather the edges out thin and wide so the repair melts into the wall like a smooth saxophone solo fading into the night.
- Sand with soul, not with force. Use a fine-grit sandpaper and move in gentle, rhythmic circles. If you go too heavy-handed, you’ll lose the shape of your work; aim for a surface so smooth it feels like a whispered lyric.
- Clean the stage before the performance. Before you lay down a single drop of compound, make sure you’ve swept away every speck of dust and loose debris from the hole. You can’t build a masterpiece on a cluttered foundation.
- Listen to the texture. As you work, run your fingers lightly over the patch to feel for imperfections. Your hands are your best critics; if it doesn’t feel like a continuous, unbroken melody under your touch, it isn’t ready for the final coat.
The Final Note: Finding Your Smooth Rhythm
We’ve danced through the grit and the grime, from selecting your essential tools to navigating the delicate nuances of plaster and drywall. Remember, whether you were filling a tiny puncture or mending a significant scar, the secret lies in the patience of your strokes. It’s about that steady, rhythmic application of the compound, ensuring every layer sits flush and every edge blends seamlessly into the surrounding landscape. Don’t rush the drying process; let the stillness work its magic before you bring out the sandpaper to refine your masterpiece. By mastering these steps, you haven’t just fixed a surface; you’ve restored the visual harmony of your space.
As I sit here at ‘The Muse’, listening to the rhythmic clack of the keys, I’m reminded that life, much like a wall, often comes with unexpected cracks and imperfections. But just as we’ve learned to patch these voids with grace and precision, you have the power to mend the breaks in your own creative journey. Don’t let a setback define the composition of your life. Instead, view every repair as an opportunity to build something even stronger and more beautiful than what existed before. Keep smoothing, keep refining, and most importantly, keep creating your own unique melody.